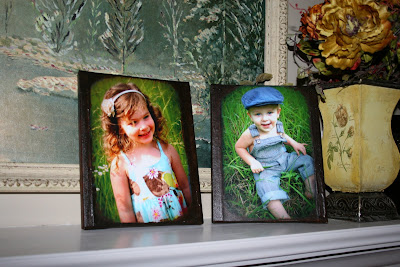
Now if you know me you know that i'm not a scrapbooker. Total wannabe but never have started. I have minimal scrapbooking items. MINIMAL! But i have tons of paint and canvases and photographs. And i always keep Modge Podge on hand. So for all you scrapbooking ladies out there .....here is a project you might enjoy. This is what you will need:

Paint Brush
Stamp Ink {color of choice}
Ink Sweeper
Photograph

First Coat your canvas with modge podge. Then take your photograph and lay in on your canvas. Apply a coat of modge podge on top of your photo. The modge podge will look milky at first but it will dry clear. I can not stress to you how important it is to use Matte Modge Podge. Trust me it looks awesome! I printed these photos at Target at the instant copier and they worked great. They didn't go all wonky on me or anything. I then let the first coat dry and brushed on another 2 coats. Make sure to let dry in between coats.

Next up i took the ink and started dabbing it on the sides and around the corners. I used a charcoal color and then added some brown to tone it down some. I wanted these to look vintage so i made sure to round out the corners good. Keep applying it to your liking. Let dry.....


No comments:
Post a Comment